
Our jazzier new Google Sheets Template will allow you to build a complete prospecting strategy on LinkedIn and Sales Navigator while also automatically scheduling follow up messages.
Introducing our jazzier GST template!✨
We are delighted to showcase our refreshed Google Sheets Template (GST) to help you build an advanced and complete prospecting strategy on LinkedIn and Sales Navigator.
Overview: This guide will show you step-by-step how easy it is to master using this template. As a LinkedIn or Sales Navigator user, you can use this GST to schedule automated personalized follow-up messages to your prospects. It was designed to create an outreach workflow for 5- 7 Phantoms.
Why use this template? This template is essential for anyone who is actively using LinkedIn or Sales Navigator for prospecting. Use this template alongside our Phantoms to generate leads, create stronger ties with prospects and ultimately scale your conversion.
What will you achieve using this template?
1. Store a list of leads from different sources (searches, groups, posts)
2. Send automatic follower invitations with customized messages
3. Monitor connection requests
4. Schedule 1 to 3 follow-up messages with personalized content
5. Retrieve answers to connection invites or messages
What you’ll need:
▸ A ZigiBots account
▸ 5-7 Phantom slots
▸ A regular LinkedIn account or a Sales Navigator account
▸ Our new Spreadsheet Template which will allow you to chain your Phantoms together, visualize your workflow progress, and find all your data in one place.
Set-up time: 30 minutes
Are you a Sales Navigator user?
This template is compatible with using Sales Navigator Search or List. You'll be able to select this option during the first step of building your workflow. Although the Phantoms for the following next steps are labeled "LinkedIn," this does not change anything for your prospecting activities.
It just means that we'll be using your LinkedIn inbox instead of your Sales Navigator inbox. It'll work a treat.
Eager to get started? Let's begin!
If it's the first time you're using a template do take a few minutes to watch Alex's helpful tutorial to learn how you can quickly and easily set up your spreadsheet template.
Quick Walkthrough
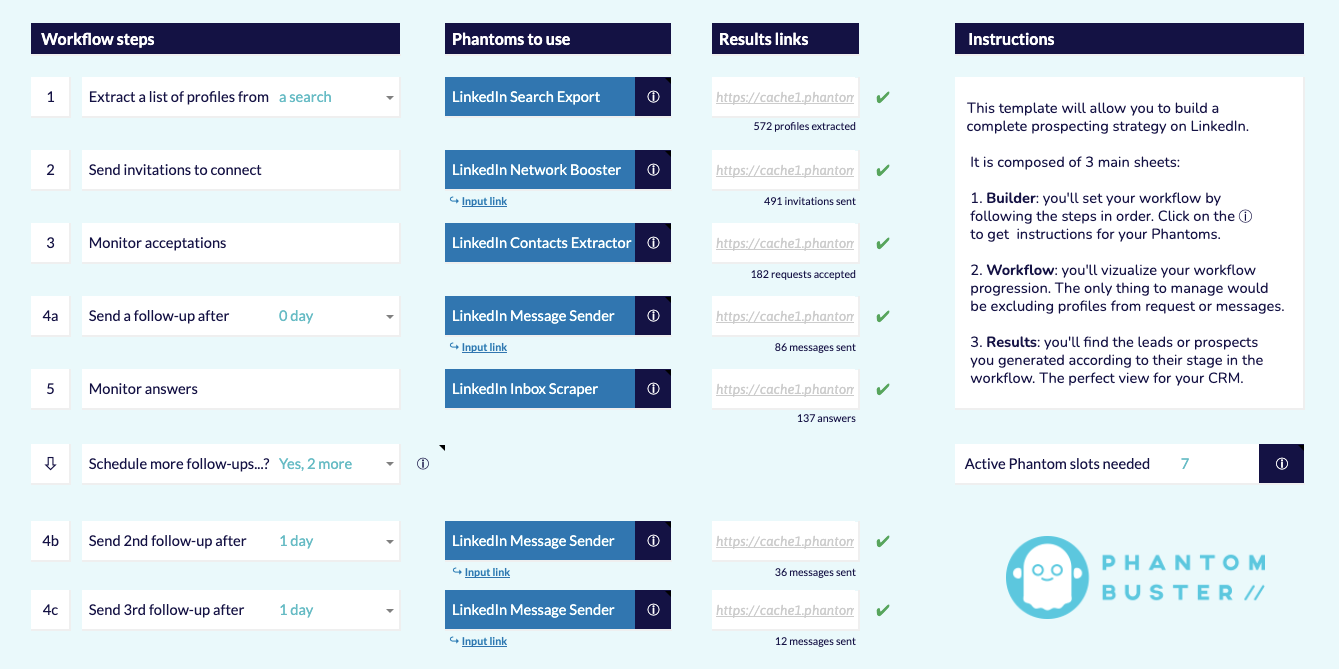
This template is composed of 3 main sheets: Build, Workflow and Results.
1. Build 🧰
On this sheet, you can set-up your workflow by following the outlined steps one by one.
How to optimize using this sheet
You can extract a list of LinkedIn profiles from different sources including: a LinkedIn or Sales Navigator search, a Sales Navigator list, a group, liked posts or liked comments.
You can also click on each Phantom name to directly access the page of each Phantom.
Click on the ⓘ to get specific instructions for each Phantom. Make sure to follow these guidelines carefully to make your template work seamlessly.
Once the Phantom has finished running, paste the results link in the related cell next to each Phantom's label.
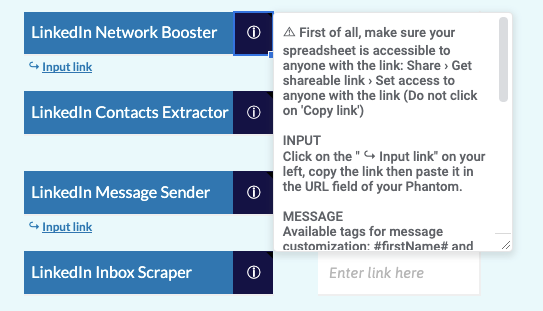
Please note: Your template must be accessible to anyone with the link so that all Phantoms have access to your sheet. Otherwise, your Phantoms like Network Booster or Message Sender cannot access your template data.

Phantoms like Network Booster and Message Sender will require you to copy the input link of the template. To do so, click on the " ↪ Input link", copy the link then paste it in the URL field of your Phantom.
Things to avoid ❌
A common mistake when configuring the Network Booster or Message Sender Phantoms is enabling data scraping. You should never select this option, or the template might not work!
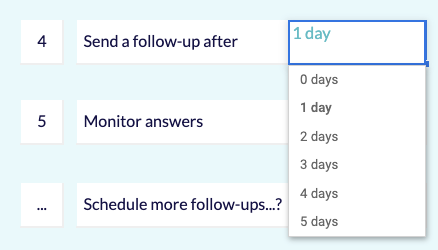
You can also opt to schedule 1 or 2 more follow-ups using the drop-down menu at the bottom left.
Please note that this will require additional active Phantom slots.

You can delay follow-up messages according to their date of acceptance (follow-up #1) or previous follow-ups sent per date (follow-up #2 & #3).
For example, if a prospect accepts your invitation to connect on Monday and you've selected the option "2 days", they will receive your follow-up message on Wednesday.
Additional Info ℹ️
Always make sure that you have enough Phantom slots available.
Do not delete a Phantom you're using with your template or you'll lose all of the data collected.
There are some essential tips stored in the ⓘ of this section (see screenshot below). Please read them all as you go to optimize your use of the template.

2. Workflow 🔨
On this sheet, you can visualize your workflow's progression.
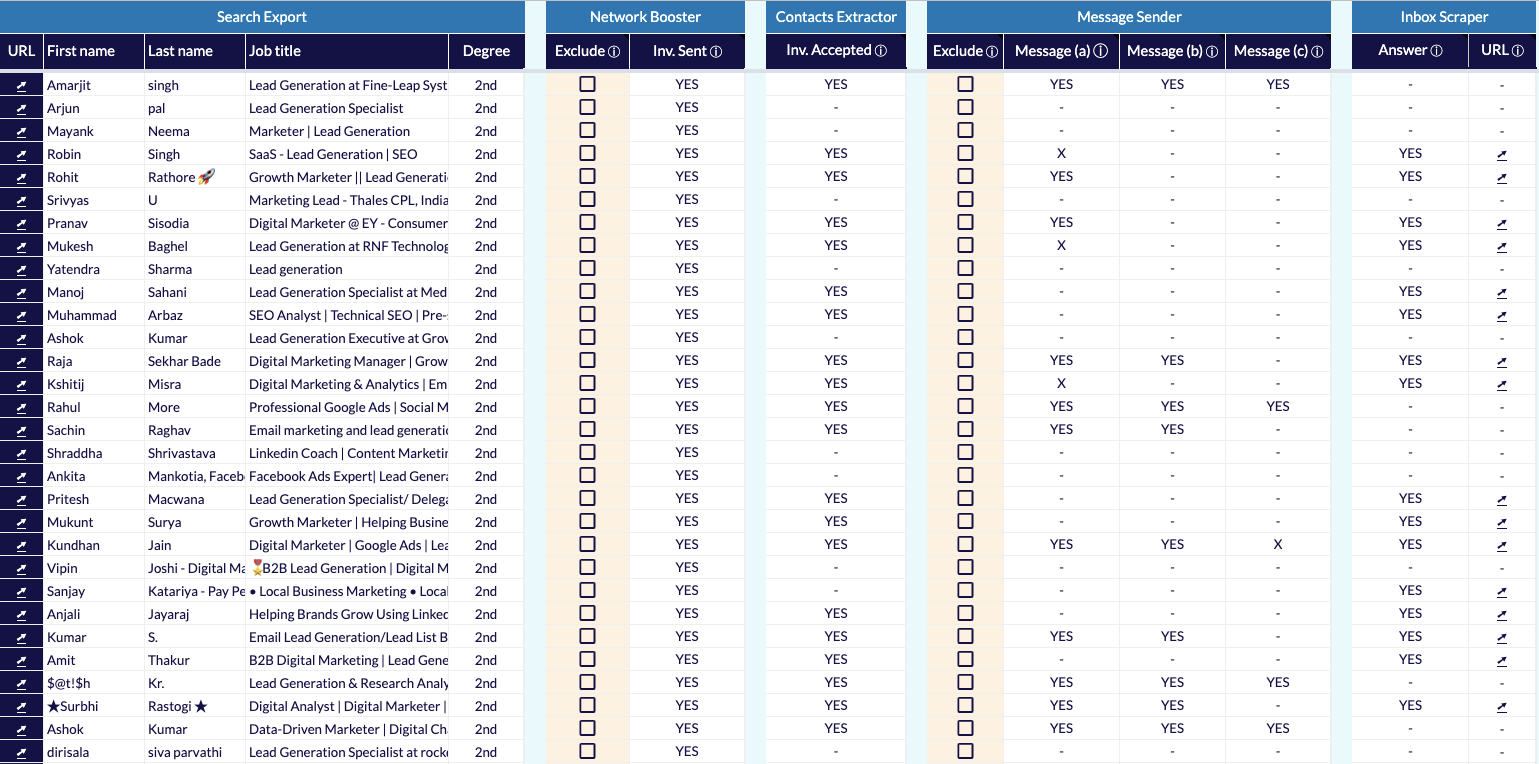
How to optimize using this sheet
You can exclude profiles from receiving your invitation or your follow-up messages by checking the boxes. Make sure to this after step 1, before sending invitations or messages.
Things to avoid ❌
Do not modify anything on this sheet- even by adding a filter! The only changes you should make here are to exclude any profiles by ticking any box.
Additional Info ℹ️
Only people who've accepted your invitation will receive your follow-up messages.
Follow-up messages are sent only if the person did not reply to your invitation or previous follow-up messages.
3. Results 📈
You'll find on this sheet the leads or prospects you generated according to their stage in the workflow. This gives you a perfect overview of your CRM.
Make sure not to change the display while you're exporting data from this sheet to your CRM or another Phantom.
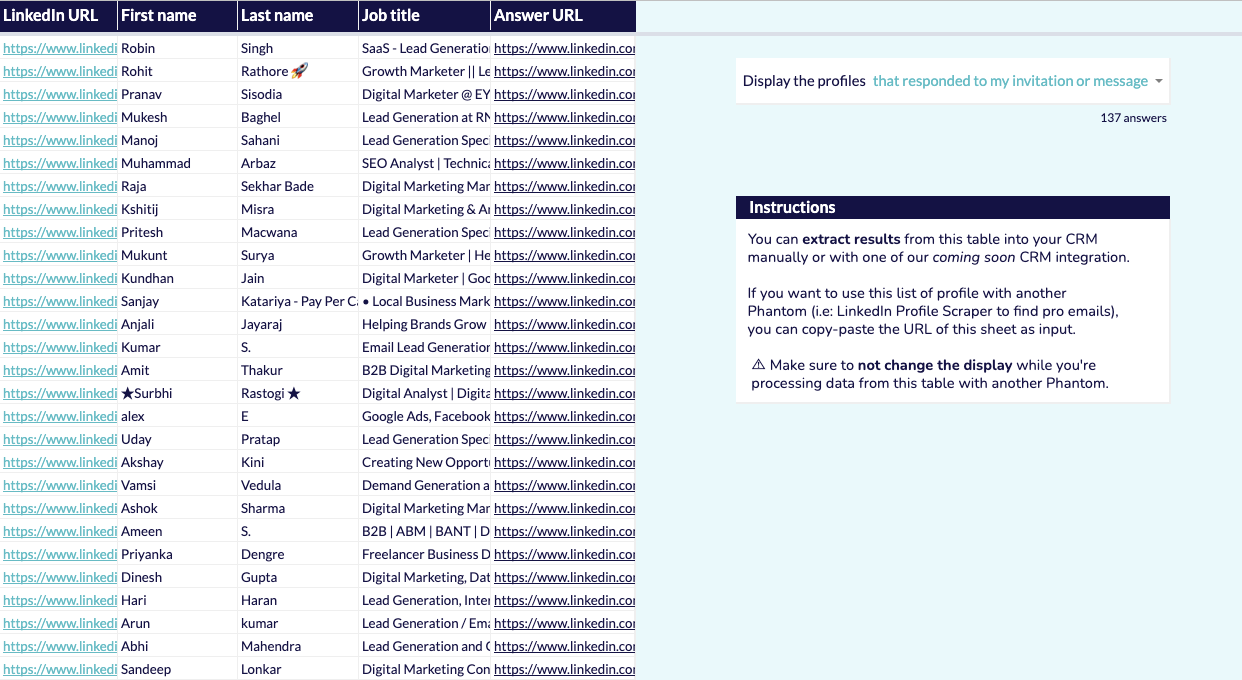
How to optimize using this sheet
You can simply use the Display the profiles dropdown menu to display profiles according to their stage in the workflow.
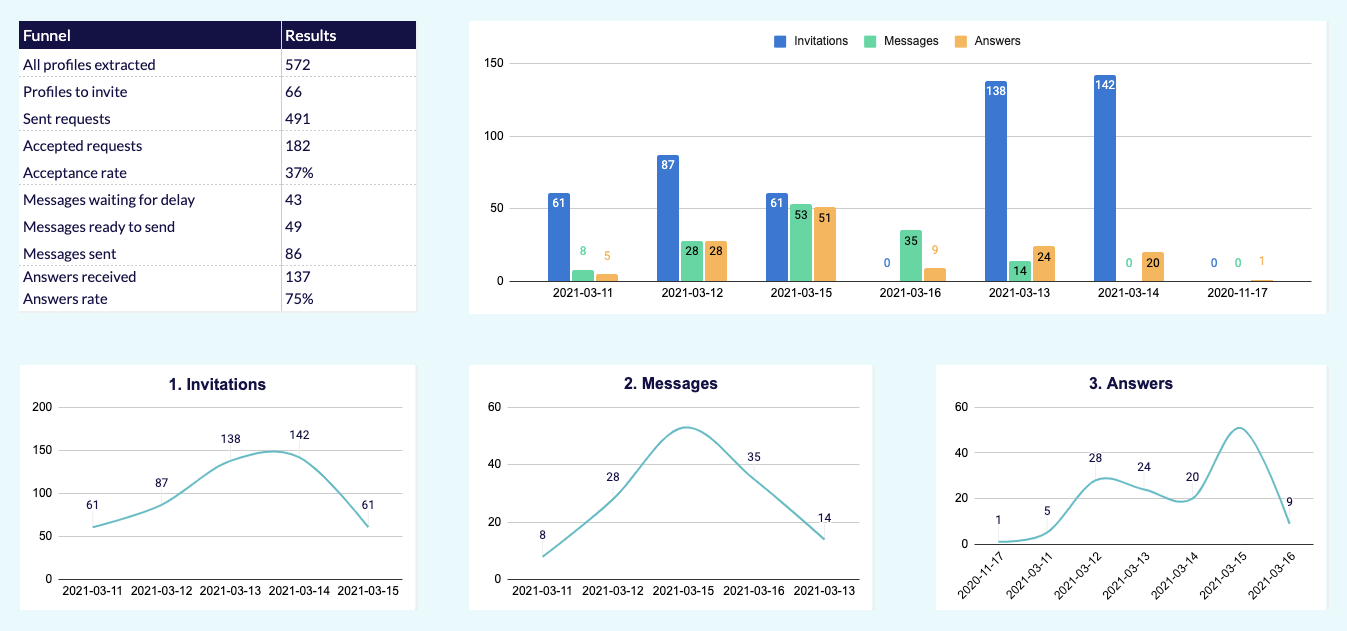
4: Additional Sheets 📊
There are two additional sheets included in this template: Performance and FAQ.
You can monitor the performance of your campaign with the Performance sheet.
The FAQ sheet outlines the answers to the most common queries template users have, as well as providing in-depth information about the template's set-up.
Three takeaways to optimize your template
1. Follow the instructions for each Phantom found via the ⓘ button
2. Do not modify anything, especially by adding filters, new columns, or rows.
3. Use a set of new Phantoms for your first template. For your next use you can use the "renaming" feature for the next templates (see tutorial).
Wrapping Up ⌛
That is it for this quick guide to our remastered GST. We hope that you have found it useful. By using this template you now have simplified the steps involved in your prospecting strategy workflow while maintaining a tight grip on your results.
As always if you have any feedback or questions please leave a comment below and we will follow up.


